Webhooks by Zapier handles the basics — accept POST, fire a Zap. Anything beyond that (verifying signatures, ingesting email or forms, replaying failed Zap runs deterministically, DLQ recovery) you have to bolt on. Put Hooksbase in front and your Zaps stay simple while the event layer underneath gets serious.
Architecture
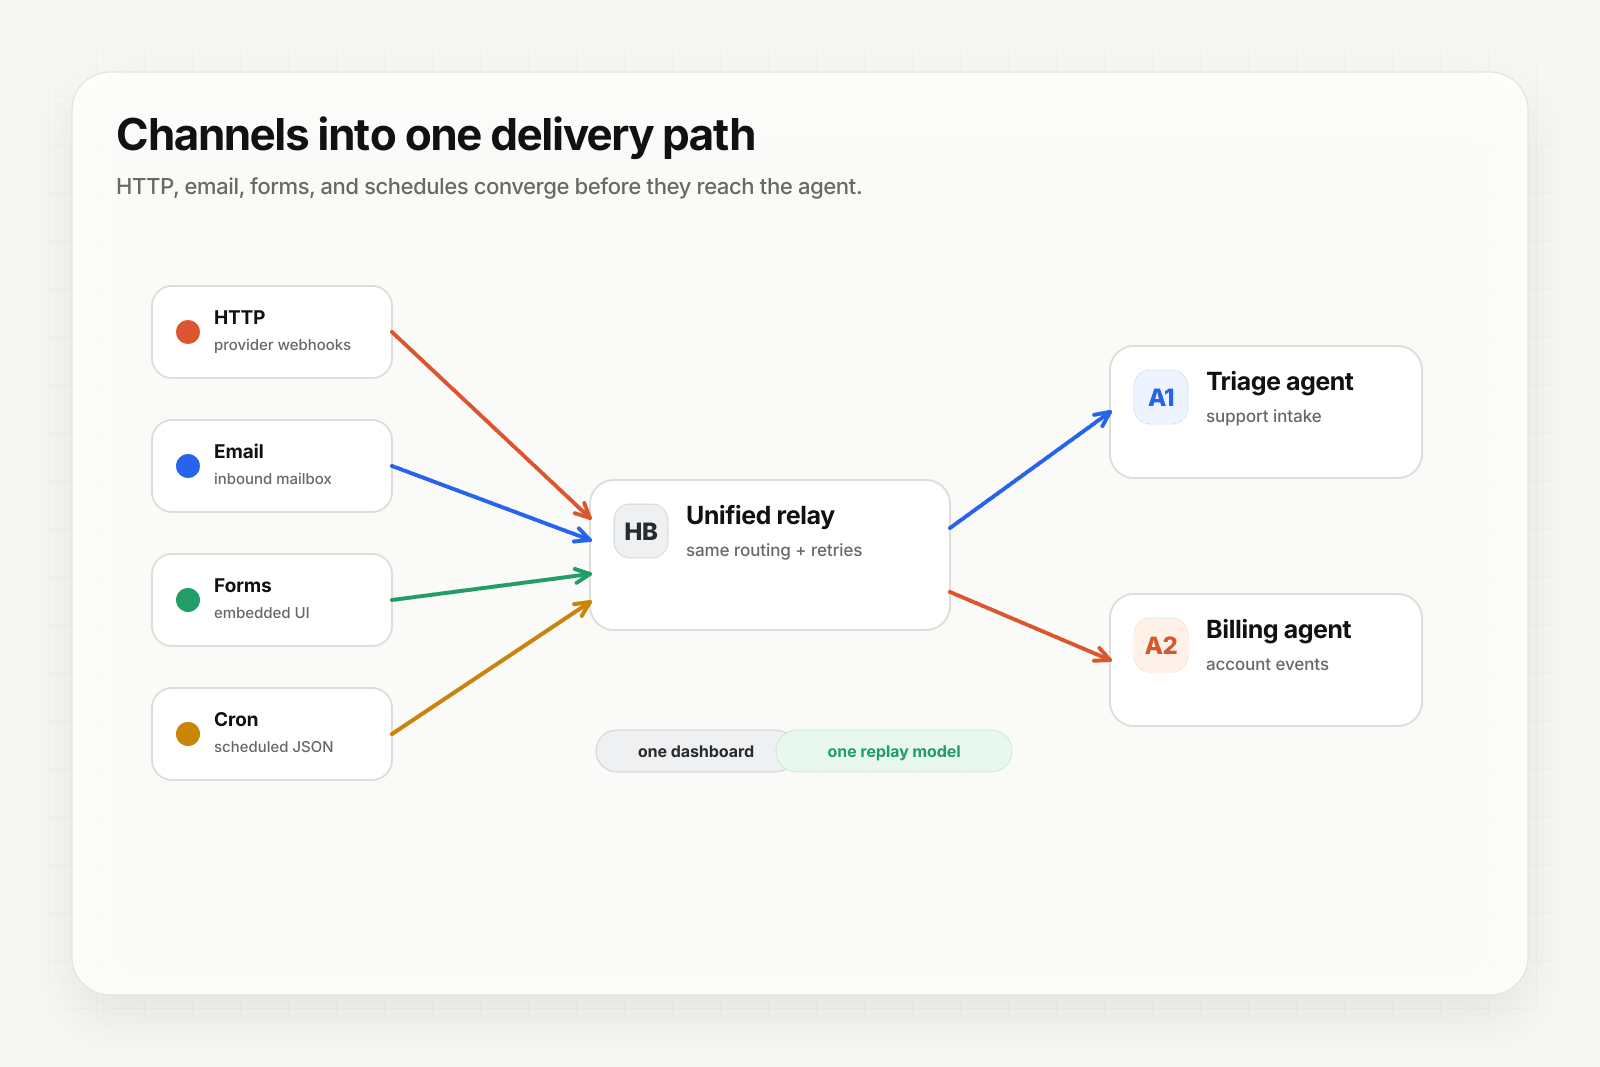
[Event sources]
   ↓ (HTTP, email, form, cron)
[Hooksbase]
   ↓ verifies supported providers after ingest auth, routes, transforms, retries
   ↓ (HTTP webhook to Zapier)
[Your Zap]
   ↓
[Zap output]
Step 1: Get your Zapier webhook URL
In Zapier, create a new Zap. Pick Webhooks by Zapier as the trigger app, then Catch Hook as the trigger event. Zapier gives you a custom URL like:
https://hooks.zapier.com/hooks/catch/123/abcdef/
Copy it.
Step 2: Create the Hooksbase webhook
- Sign in to Hooksbase, create a project
- Create a webhook with the Zapier URL as the destination
- (Optional) Add a provider pack — Stripe / GitHub / Clerk / Slack / Resend — so signatures get verified before the Zap fires after the request passes Hooksbase ingest auth
- Save — Hooksbase gives you a public HTTP ingest URL, a form ingest URL, and an email ingest address
Step 3: Point your event sources at Hooksbase
Take the Hooksbase HTTP ingest URL and send generic HTTP producers to it with Authorization: Bearer <ingest secret>. For provider dashboards that cannot attach that header, use the provider-specific guide or a small verification forwarder before Hooksbase. Use the email ingest address for email-triggered Zaps, the form ingest URL for embedded forms, and Starter+ scheduled webhooks for cron-style Zap firing.
Step 4: Test and finish the Zap setup
Send a test event:
curl -X POST https://hooks.hooksbase.com/v1/ingest/YOUR_PUBLIC_ID \
  -H "Authorization: Bearer whsec_..." \
  -H "Content-Type: application/json" \
  -d '{"event": "test.zap", "data": {"from": "hooksbase"}}'
Back in Zapier, click "Test trigger" — Zapier should pull in the sample event. Map the fields in your downstream Zap steps and turn the Zap on.
What your Zap receives
Hooksbase does not automatically wrap the body with provider metadata. With a provider pack configured, provider metadata is persisted on the delivery and available to routing/search/replay metadata, while Zapier receives the original provider payload unless you configure a payload transform over that payload.
Transforms do not currently inject the provider metadata object, so use provider fields that already exist in the payload or add enrichment inside the Zap if you need that metadata in Zapier steps.
Use a Starter+ JSON transform if your Zap needs a custom envelope.
What you gain over plain Webhooks by Zapier
- Signature verification via Starter+ provider packs before the Zap fires for supported providers
- Email + form + Starter+ scheduled cron as Zap triggers — Webhooks by Zapier is HTTP-only
- Deterministic replay of failed Zap runs from the Hooksbase dashboard
- DLQ + Starter+ bulk re-drive when a Zap step fails for many events at once
- Routing to the right Zap via Hooksbase routing rules, so different event classes can land in different Zaps
- Throttling and FIFO (Pro+) — when your Zap volume bumps into Zapier task limits
Cost note
Every Hooksbase delivery to a Zap is one Zapier task. If you use Starter+ bulk replay for 500 failed events, that's 500 tasks. Plan your Zapier task budget accordingly — bulk re-drive is great for recovery, but it does count.
What next
- Zapier + Hooksbase landing — the page version of this walkthrough with use cases
- Route events to the right agent with routing rules — for selecting the right Zap per event
- Recover failed agent events with DLQ and replay